
AppleInsider could earn an affiliate fee on purchases made by way of hyperlinks on our web site.
Whereas the primary focus in 2022 is on streaming, the Music app in your Mac nonetheless permits you to import music information and CDs into your music library. Here is find out how to do it.
Right here is find out how to add music information and folders, edit singular songs or an entire album, and find out how to change the album paintings in macOS Ventura.
The best way to add information to the Music app
Importing music is simple to do within the Music app, and solely takes a couple of steps. Right here is find out how to add music information and folders.

- Open Music
- Go to the Lately Added tab
- Click on on File from the highest toolbar
- Click on Import
- Choose both the audio file or folder — containing a number of audio information — that you simply wish to import
You may as well drag and drop audio information instantly into the Music app to make the import quicker and extra seamless.
When you import the file or folder, a brand new album will likely be created within the Lately Added tab of the appliance with the title and paintings that was pre-added to the file earlier than import being displayed.
The best way to import a CD in macOS Ventura
Importing a CD is simple to do with the Music app. The hardest half is discovering a pc that also homes a disc drive. There are clearly exterior drives you should buy, however utilizing them with USB-C and hubs is usually a bit difficult generally. We’ll be talking extra about this quickly.
- Open Music
- Insert the CD you wish to import into the CD or DVD drive
- The CD will seem under the Gadgets tab within the sidebar
- All of the songs on the CD will robotically begin importing into your Library
- To cancel the importing at anytime, click on Cease Importing. Any songs already imported will nonetheless be in your Library.
- When the songs are completed importing, click on the Eject button close to the highest proper of the music window
As soon as your CD has been imported, you may take heed to the songs it had, create playlists out of them, or edit the audio file’s metadata additional to your likings.
In the event you import the CD onto a pc that’s not your personal — however is logged into your Apple ID — the music will likely be transferred to your gadgets by way of iCloud Music Library (in case you have it turned on).
When you import your audio, you might wish to edit the metadata of it. This may increasingly embody the file’s title, writer, album paintings, and different particulars about it.
It is best to resolve if you wish to edit only one tune or the entire album earlier than making adjustments.
- Two-finger click on, right-click, or control-click on the tune to edit that one particular tune, or the album paintings to edit the entire album
- Click on on Get Data
- A immediate will ask you should you’re certain you wish to edit the merchandise(s). Choose Edit Gadgets from the choices given.
- To edit totally different features of the audio file or album, simply click on on the textual content field with the knowledge you wish to edit and sort in what you need it to say
- Click on OK on the backside proper of the menu to use the adjustments you had made
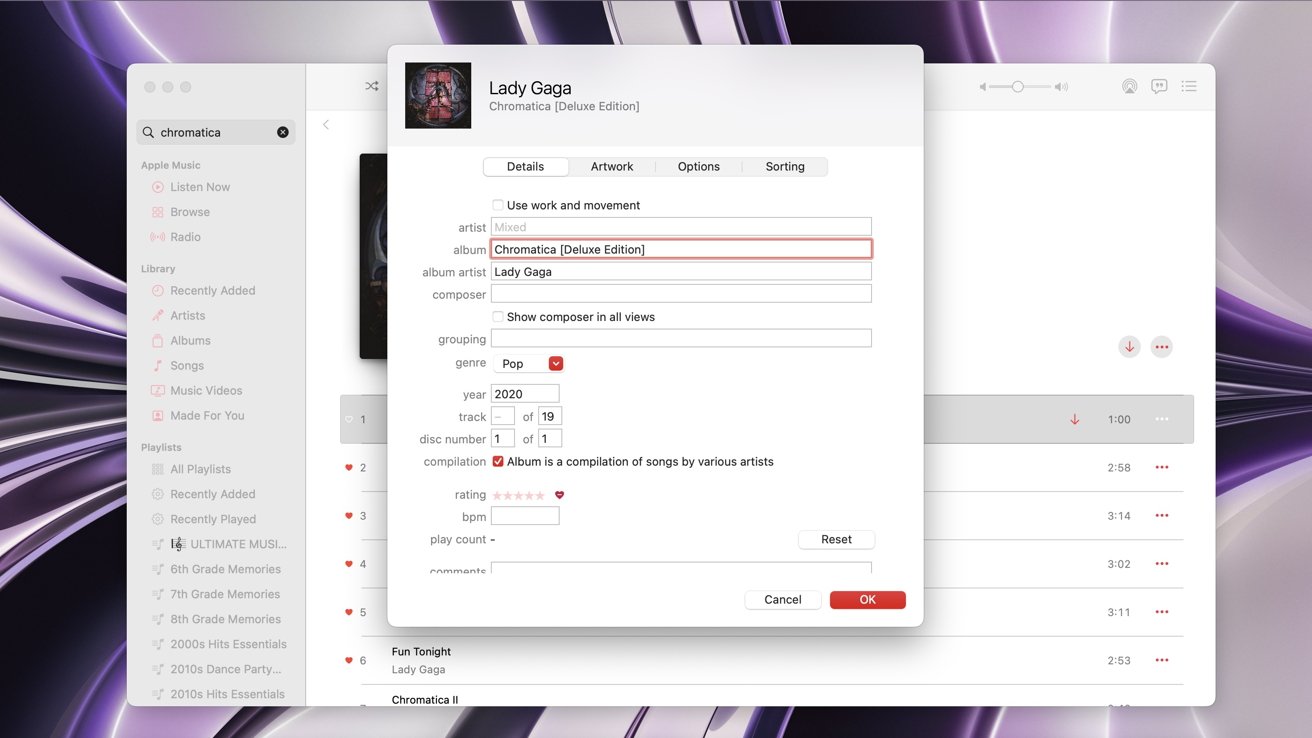
If you’re modifying a singular tune inside an album and you modify both the album title or the artist of it, then the tune will likely be separated from the album it was a part of. It’ll then develop into a part of its personal album.
Altering the disc quantity — when modifying one tune from that album — will preserve the tune in the identical album location, however will likely be dropped at the underside of the album and sectioned into the brand new “Disc Quantity” space you assigned it to.
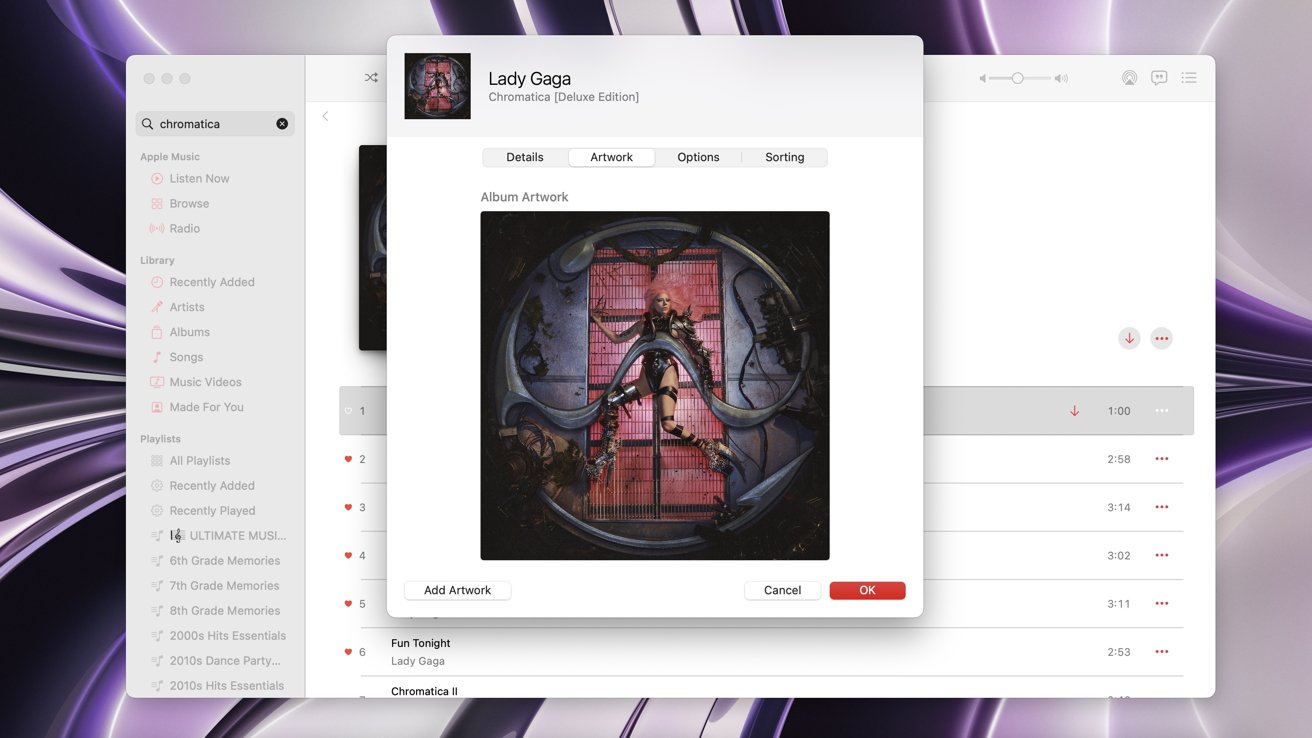
The best way to change the album paintings in macOS Ventura
If you don’t like the present paintings an album has – or simply wish to change it – you merely can inside the Music app. Right here is find out how to change it.
- Two-finger click on, right-click, or control-click on the tune or album you wish to change
- Choose Get Data
- Click on on Art work from the tabs within the menu subsequent to Particulars
- Click on on Add Art work on the backside left of the menu
- Choose the photograph you wish to change or make the album paintings to
- As soon as you choose it, the photograph will seem subsequent to the present album paintings that was beforehand there (if there was one)
- Click on OK on the underside proper of the menu to use the adjustments
The adjustments could take a couple of moments to point out in your different gadgets.
If they don’t present, attempt eradicating the obtain(s) of the tune or album after which redownload them. Do that in your different gadgets as properly.
Even should you downloaded songs from Apple Music, you may go in and alter their album paintings or particulars about them. It doesn’t matter the place the audio observe got here from.
Carry on listening
Importing music information and modifying the file particulars and paintings is a good way to customise your music library to your private preferences.
If you’re not subscribed to Apple Music after which resolve to hitch the service, the metadata that you simply custom-made (resembling album paintings) could also be modified to the default model that Apple Music gives. Any downloaded songs (like from an bodily CD) can even be transformed to Dolby Atmos format — in case you have that enabled and it’s supplied for these songs.


![What different app shops will imply for iPhones [The CultCast]](https://www.cultofmac.com/wp-content/uploads/2022/12/CultCast-573-app-store.jpg "What different app shops will imply for iPhones [The CultCast]")
