
Whether or not you’re making a social media app or a productiveness device, the tab bar interface can improve the consumer expertise by making it extra intuitive and user-friendly. With SwiftUI’s TabView, making a seamless and customizable tab interface has by no means been simpler.
By default, iOS shows the tab bar in its customary kind, permitting customers to shortly swap between completely different app capabilities with ease. Nonetheless, as a developer, you in all probability need to customise the tab bar to suit the particular wants of your app.
On this tutorial, you’ll discover ways to create a scrollable and animated tab bar which helps infinite tab gadgets utilizing SwiftUI. Check out the top outcome under to get a glimpse of what you’ll have the ability to obtain by the top of the tutorial.
Introducing Tab View and Tab Bar
In case you haven’t used TabView earlier than, let’s have a fast stroll by. To create a tab view, you simply want to make use of TabView and embed the kid views inside. For every of the kid views, you apply the tabItem modifier to specify the merchandise description. Right here is an instance:
|
1 2 3 4 5 6 7 8 9 10 11 12 13 14 15 16 17 18 |
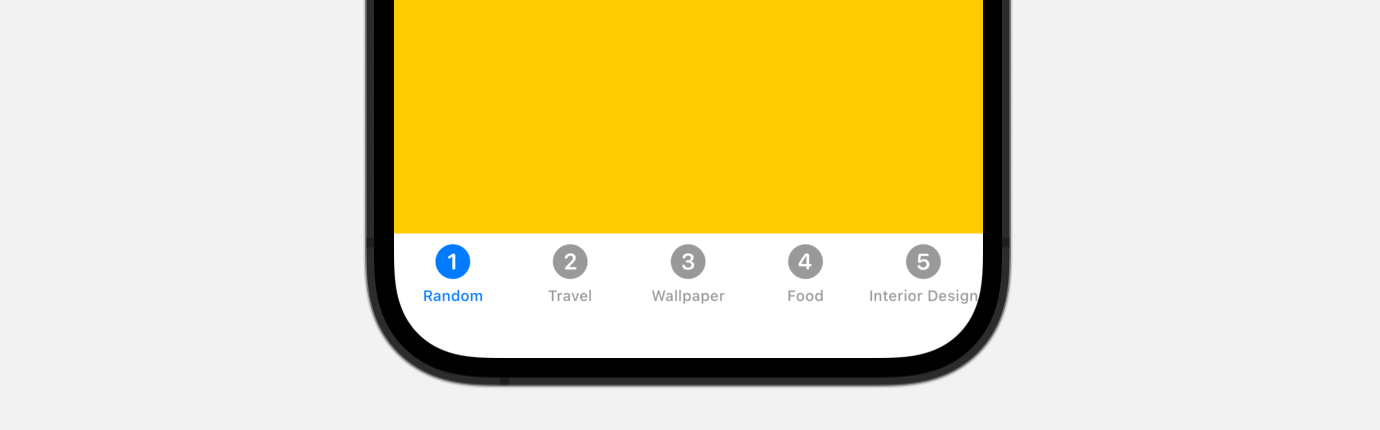
struct ContentView: View { let colours: [Color] = [ .yellow, .blue, .green, .indigo, .brown ] let tabbarItems = [ “Random”, “Travel”, “Wallpaper”, “Food”, “Interior Design” ]
var physique: some View { TabView { ForEach(colours.indices, id: .self) { index in colours[index] .body(maxWidth: .infinity, maxHeight: .infinity) .tag(index) .tabItem { Picture(systemName: “(index + 1).circle”) Textual content(tabbarItems[index]) } } } } } |
The code above creates a easy tab view with 5 tab gadgets. You utilize the Picture view to show the tab icon. In case you’ve written the code in Xcode, it’s best to see a tab bar within the preview.
The TabView has one other init technique for this objective. The strategy requires a state variable which comprises the tag worth of the tab.
|
TabView(choice: $selectedIndex) |
For instance, declare the next state variable in ContentView:
|
@State personal var selectedIndex = 0 |
Now should you change the worth of selectedIndex, the tab view will routinely swap to the corresponding tab. It’s possible you’ll modify the code like this to check it out:
|
TabView(choice: $selectedIndex) { . . . } .onAppear { selectedIndex = 2 } |
When the tab view seems, the third tab is routinely chosen.
Constructing a Customized Scrollable Tab Bar
As you possibly can see within the remaining outcome above, the tab bar is scrollable, which is especially helpful when it’s worthwhile to accomodate greater than 5 gadgets. To construct this practice tab bar, we are going to use each ScrollView and ScrollViewReader to create our personal view.
As you possibly can see within the remaining outcome above, the tab bar is scrollable, which is especially helpful when it’s worthwhile to accommodate greater than 5 gadgets. To construct this practice tab bar, we are going to make the most of each ScrollView and ScrollViewReader.
Let’s title our tab bar view TabBarView and create it like this:
|
1 2 3 4 5 6 7 8 9 10 11 12 13 14 15 16 17 18 19 20 21 22 23 24 25 26 27 28 29 30 31 32 33 |
struct TabBarView: View { var tabbarItems: [String]
@State var selectedIndex = 0
var physique: some View { ScrollViewReader { scrollView in ScrollView(.horizontal, showsIndicators: false) { HStack { ForEach(tabbarItems.indices, id: .self) { index in
Textual content(tabbarItems[index]) .font(.subheadline) .padding(.horizontal) .padding(.vertical, 4) .foregroundColor(selectedIndex == index ? .white : .black) .background(Capsule().foregroundColor(selectedIndex == index ? .purple : .clear)) .onTapGesture { withAnimation(.easeInOut) { selectedIndex = index } } } } } .padding() .background(Shade(.systemGray6)) .cornerRadius(25)
}
} } |
This tradition tab view accepts an array of tab bar gadgets. For demo functions, we’re utilizing a String array. Nonetheless, in real-world functions, chances are you’ll need to create your personal customized kind for the tab merchandise.
To allow scrolling inside the tab bar, we’ve embedded the entire tab gadgets in a scroll view. Moreover, we’ve wrapped the scroll view with a scroll view reader to make sure that the chosen tab merchandise is at all times seen.
When a selected tab merchandise is chosen, we replace the selectedIndex variable to mirror the chosen index. This permits us to focus on the energetic tab merchandise and supply suggestions to the consumer.
To preview this practice tab bar, you possibly can add the TabBarView to the preview like this:
|
struct ContentView_Previews: PreviewProvider { static var previews: some View { ContentView()
TabBarView(tabbarItems: [ “Random”, “Travel”, “Wallpaper”, “Food”, “Interior Design” ]).previewDisplayName(“TabBarView”) } } |
Proper now, the customized tab bar works fairly good. Nonetheless, chances are you’ll discover that it’s worthwhile to manually scroll the tab bar with a purpose to reveal the final merchandise. To repair this difficulty, you possibly can connect the next code to the ScrollView:
|
.onChange(of: selectedIndex) { index in withAnimation { scrollView.scrollTo(index, anchor: .middle) } } |
When the chosen index is up to date, we name the scrollTo technique to maneuver the scroll view.
Rework the Animation with matchedGeometryEffect
You’ve constructed a dynamic and scrollable tab bar, however wouldn’t or not it’s nice if we will make the animation even higher? Presently, the tab bar makes use of a fade animation when switching between tab gadgets. By incorporating matchedGeometryEffect into the tab bar, you possibly can create a a lot smoother and visually interesting animation. Let’s see learn how to implement it.
First, let’s create a brand new struct referred to as TabbarItem for the tab bar merchandise like this:
|
1 2 3 4 5 6 7 8 9 10 11 12 13 14 15 16 17 18 19 20 21 22 23 24 |
struct TabbarItem: View { var title: String var isActive: Bool = false let namespace: Namespace.ID
var physique: some View { if isActive { Textual content(title) .font(.subheadline) .padding(.horizontal) .padding(.vertical, 4) .foregroundColor(.white) .background(Capsule().foregroundColor(.purple)) .matchedGeometryEffect(id: “highlightmenuitem”, in: namespace) } else { Textual content(title) .font(.subheadline) .padding(.horizontal) .padding(.vertical, 4) .foregroundColor(.black) }
} } |
With matchedGeometryEffect, all you want is describe the looks of two views. The modifier will then compute the distinction between these two views and routinely animates the scale/place modifications. So within the code above, we spotlight the tab merchandise in purple when it’s energetic. In any other case, we show a standard textual content model.
Within the TabBarView, declare a brand new namespace variable:
|
@Namespace personal var menuItemTransition |
After which, rewrite the code of the ForEach loop like this:
|
ForEach(tabbarItems.indices, id: .self) { index in
TabbarItem(title: tabbarItems[index], isActive: selectedIndex == index, namespace: menuItemTransition) .onTapGesture { withAnimation(.easeInOut) { selectedIndex = index } } } |
When you made the change, it’s best to discover a a lot better animation when switching between tab gadgets.

Utilizing the Customized Tab Bar
We’ve got to make a minor change within the TabBarView earlier than we will apply it to our ContentView. In TabBarView, modify the state variable to a binding variable like this:
|
@Binding var selectedIndex: Int |
Now you’re prepared to make use of this practice tab bar in different views. In ContentView, replace the physique half like this:
|
ZStack(alignment: .backside) { TabView(choice: $selectedIndex) { ForEach(colours.indices, id: .self) { index in colours[index] .body(maxWidth: .infinity, maxHeight: .infinity) .tag(index) .ignoresSafeArea() } } .ignoresSafeArea()
TabBarView(tabbarItems: tabbarItems, selectedIndex: $selectedIndex) .padding(.horizontal) } |
Incorporating the customized tab bar into your app is an easy course of. By wrapping the TabView in a ZStack and overlaying the TabBarView on prime of it, you possibly can simply combine the tab bar into the tab UI.
To make the challenge run easily, you additionally must replace the preview struct like this:
|
struct ContentView_Previews: PreviewProvider { static var previews: some View { ContentView()
TabBarView(tabbarItems: [ “Random”, “Travel”, “Wallpaper”, “Food”, “Interior Design” ], selectedIndex: .fixed(0)).previewDisplayName(“TabBarView”) } } |
Now you’re prepared to check the tab UI.
Wrap Up
The tab bar interface is a vital part of many fashionable cell apps, offering customers with fast and quick access to varied app capabilities. Whereas the usual tab bar typically suffices for many situations, there could also be events if you need to create a customized tab bar to boost the consumer expertise.
On this tutorial, you’ve realized learn how to create a dynamic and scrollable tab bar that may accommodate an infinite variety of tab gadgets. By incorporating matchedGeometryEffect, it’s also possible to take your tab bar’s animation to the subsequent degree. With the methods lined, you’ll have the ability to design a seamless and intuitive customized tab bar that matches your app’s particular wants.
If you wish to dive deeper into SwiftUI, you possibly can try our Mastering SwiftUI ebook.


